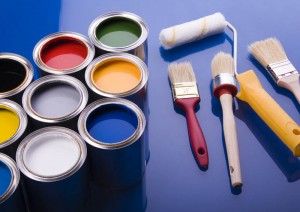
 I don’t know about you but sometimes I enjoy the idea stage of a project more than the doing stage. However, the practical aspect of a painting job can be great fun if you take some time to learn good painting practices.It’s of course so much easier to just hand over the job to a professional but the bragging rights for having done it yourself are worth the effort. In addition, nothing underpins the personalisation experience better than running those trokes on the walls yourself. So lets look at how to do it right
Assembling your tools
You will need to put together the following:
- Surface preparation tools: sand paper, rags
- Paint in your chosen colour and sheen
- Water or paint thinner, stirrers
- Brushes, rollers or trowels
Surface preparation
Chances are that you are not the first occupant of your apartment. Over the years your walls will have chipped, peeled or even stained. These flaws have to be removed before you can begin painting your walls. The best way to find flaws is to remove all the furniture from the room or cluster it in one area. Also, take down the draperies and remove the wall plates from electrical outlets and switches. Depending on the flaws you discover, you may find it necessary to engage in atleast one of these activities:
- Scraping: to remove loose particles
- Sanding: to blend the scraped surface with the even areas
- Filling: to cover surface cracks or joint gaps
- Dusting & washing: to remove all the dust
Gloss finishes have to be removed by either washing with a deglosser or sanding before repainting.
This increases adhension and ensures that the new paint holds. Remember to stick masking tape along the lines seperating any adjacent sections where you intend to apply different colours.
Applying a new coat
The actual application of paint is commonly done using a brush, roller, trowell or an airless spray. Different techniques are used depending on your tool of choice. We will focus on Brush painting as they affordable and readily available in hardware stores.
You will start by mixing your paint using water or an appropriate thinner to achieve the right thickness and consistency. The trick with using a brush is holding it right to achieve control. Trim brushes with pencil handles are grasped with the thumb and the first two fingers of the hand. For larger brushes, hold the handle with the entire hand, letting the handle span the width of your palm as you would hold a tennis racket.
Start the job by dampening the bristles of the brush to condition them and make them more efficient. With the first dip, move the brush around a bit in the paint to open the bristles and let the brush fill completely. Let the excess paint drip off for a few seconds before moving the brush to the wall. As a general rule of thumb, press the brush lightly against the surface, then, as you move the brush, add just enough pressure to make the bristles bend away from the direction of your brush stroke.
As the adage goes, “a picture speaks more than a thousand words”.
Therefore, we will attempt to illustrate actual painting techniques through pictures and video clips in the coming weeks. Adios


